Filing documents from the inbox
Upload scanned documents to an inbox, split or merge them, and file each one under the people it belongs to.
The Inbox (in the sidebar under Filing) is where new documents arrive before they are filed. You upload or scan them in, tidy them up, then file each one under the right people. Once filed, a document appears on those people's Files tab and in the File Cabinet.
Your agency may have several inboxes. An administrator decides which ones your role can use. If you have none, the page says so.
Upload documents
- Open Inbox and choose an inbox from the list at the top of the left pane.
- Select Upload and choose your files, or drag them onto the inbox. PDFs, pictures and TIFF scans are accepted.
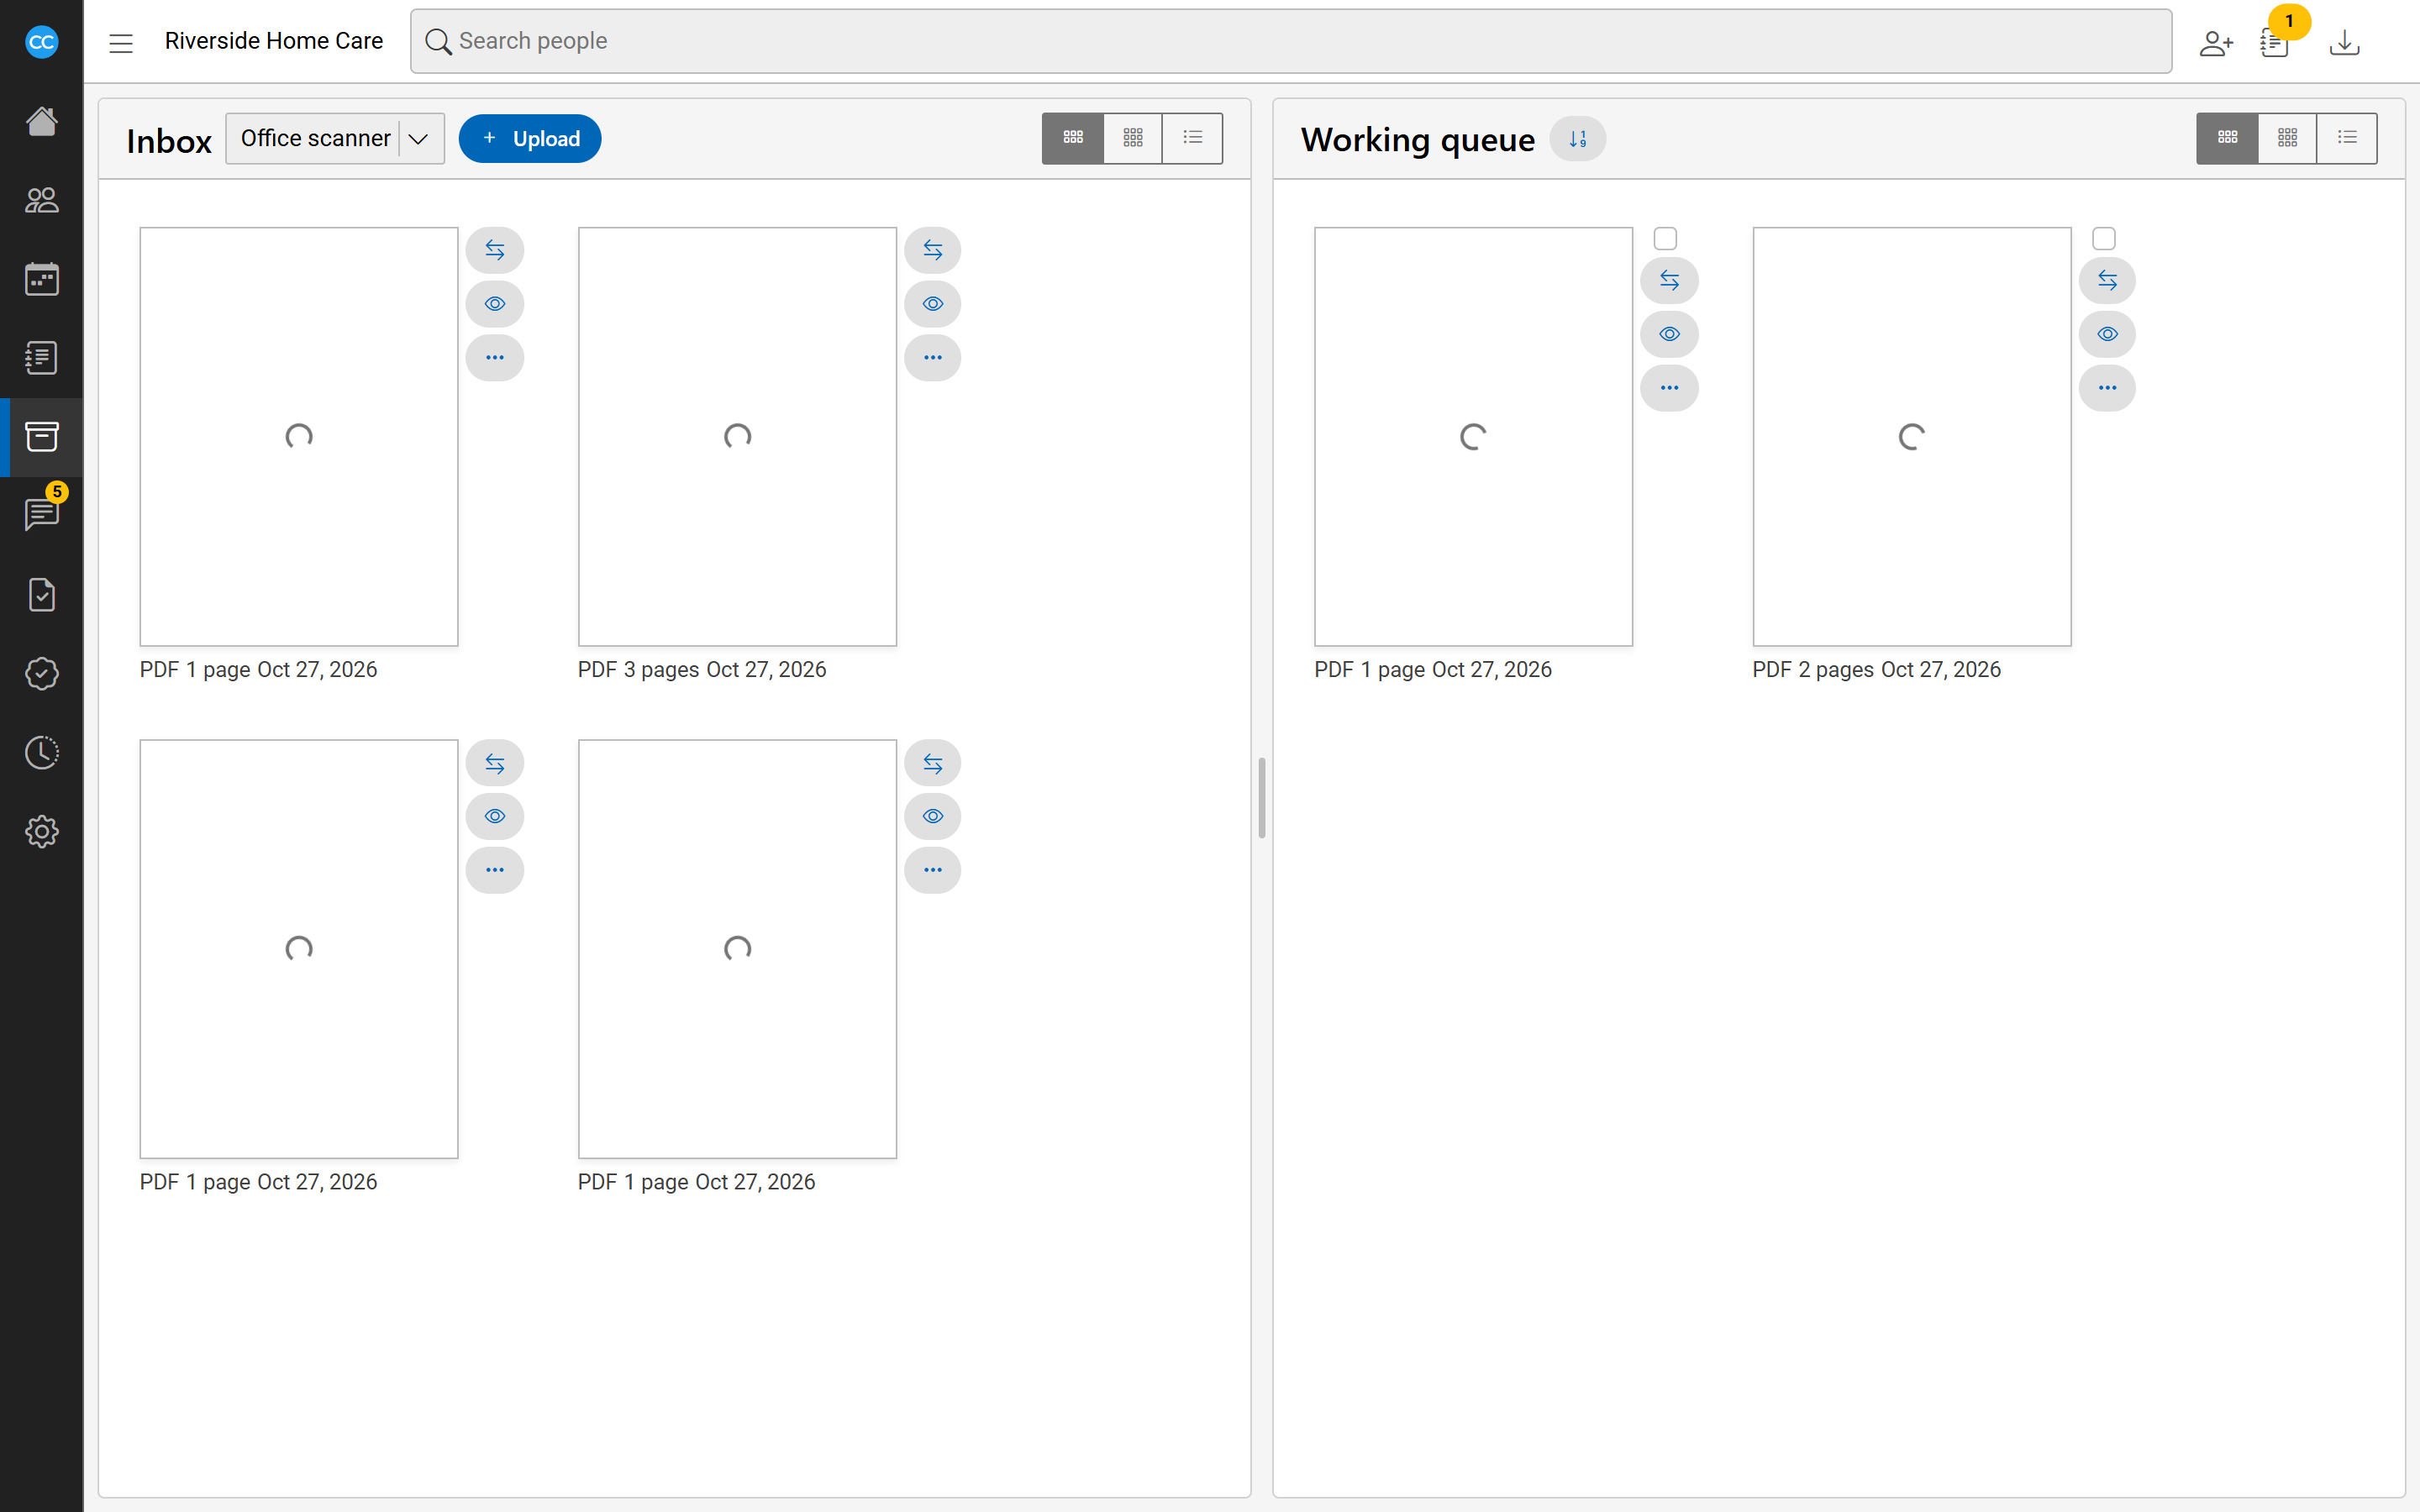
Each document shows as a tile with a picture of its first page, its type, page count and the day it was added. The buttons above each pane switch between large tiles, small tiles and a list.
Split, convert, send or delete
Select a tile's three-dots button for more:
- Split into pages - makes one file per page. Give the pages a Label (for example "Intake packet") to help put them back in order.
- Convert to PDF - for pictures.
- Send to - moves the file to another inbox.
- Delete - removes the file for good, after you confirm.
Merge files into one PDF
- Move the files to the Working queue on the right, with each tile's arrows button or by dragging them.
- Drag them into the order you want. To put split pages back in order, select the sort button beside the queue's title.
- Tick the files to merge and select Merge. They are joined left to right into one PDF.
File a document
- Select the tile's eye button (View and file). The document opens beside a form.
- Choose the Document type and who it is Filed under - one or more people.
- Enter the Completed date. Add Effective, Expires, Hours and Notes if they apply. Some document types suggest notes or an expiry date, which you can select to use.
- Select File it. The tile leaves the inbox.